Get your dbt project Lightdash-ready
info
This doc is for someone who's just getting started with Lightdash and has an empty project that they want to setup. If you have an existing Lightdash project with some Tables already in it, we'd suggest checking out Adding dimensions to Lightdash, Adding and managing Tables in Lightdash, or Adding metrics to Lightdash.
In Lightdash, everything you need for BI is written as code in your dbt project. You use dbt to transform all of the data from your data warehouse, then you use Lightdash to explore it.
But, before you hook up your dbt project to Lightdash, we want to make sure it's ready for exploring. We'll walk you through the steps of installing + using the Lightdash CLI and generating the .yml you need for your dbt project.
New to dbt?
If you haven't used dbt before, follow dbt's getting started guide before proceeding with setting up Lightdash.
Installing the Lightdash CLI tool
The Lightdash CLI is the recommended way to develop your dbt + Lightdash project. It makes development faster and easier, as well as giving you options for building more powerful automation to manage your Lightdash instance.
To install Lightdash, you'll need to have npm
installed. Mac/Linux users usually already have npm available (you can check by running npm in your command line).
To install the Lightdash CLI, run the following on your command line.
npm install -g @lightdash/cli
Or install a specific version (eg: 0.162.0)
npm install -g @lightdash/cli@0.162.0
You may need to install an additional package if you see any errors:
Mac OS
/bin/bash -c "$(curl -fsSL https://raw.githubusercontent.com/Homebrew/install/HEAD/install.sh)" # install homebrew if you don't have it
brew install unixodbc
npm install -g @lightdash/cli
Ubuntu
sudo apt install unixodbc
npm install -g @lightdash/cli
Adding Tables to your Lightdash project
Tables in Lightdash are tied 1:1 with models in your dbt project. They're the foundation of your data exploration, the backbone to figuring out your unknowns, the art behind your charts...basically, they're pretty important.
So, we wanted to go through how to actually add these Tables to your Lightdash project, and once they're in there, how you can configure them to make the most of them.
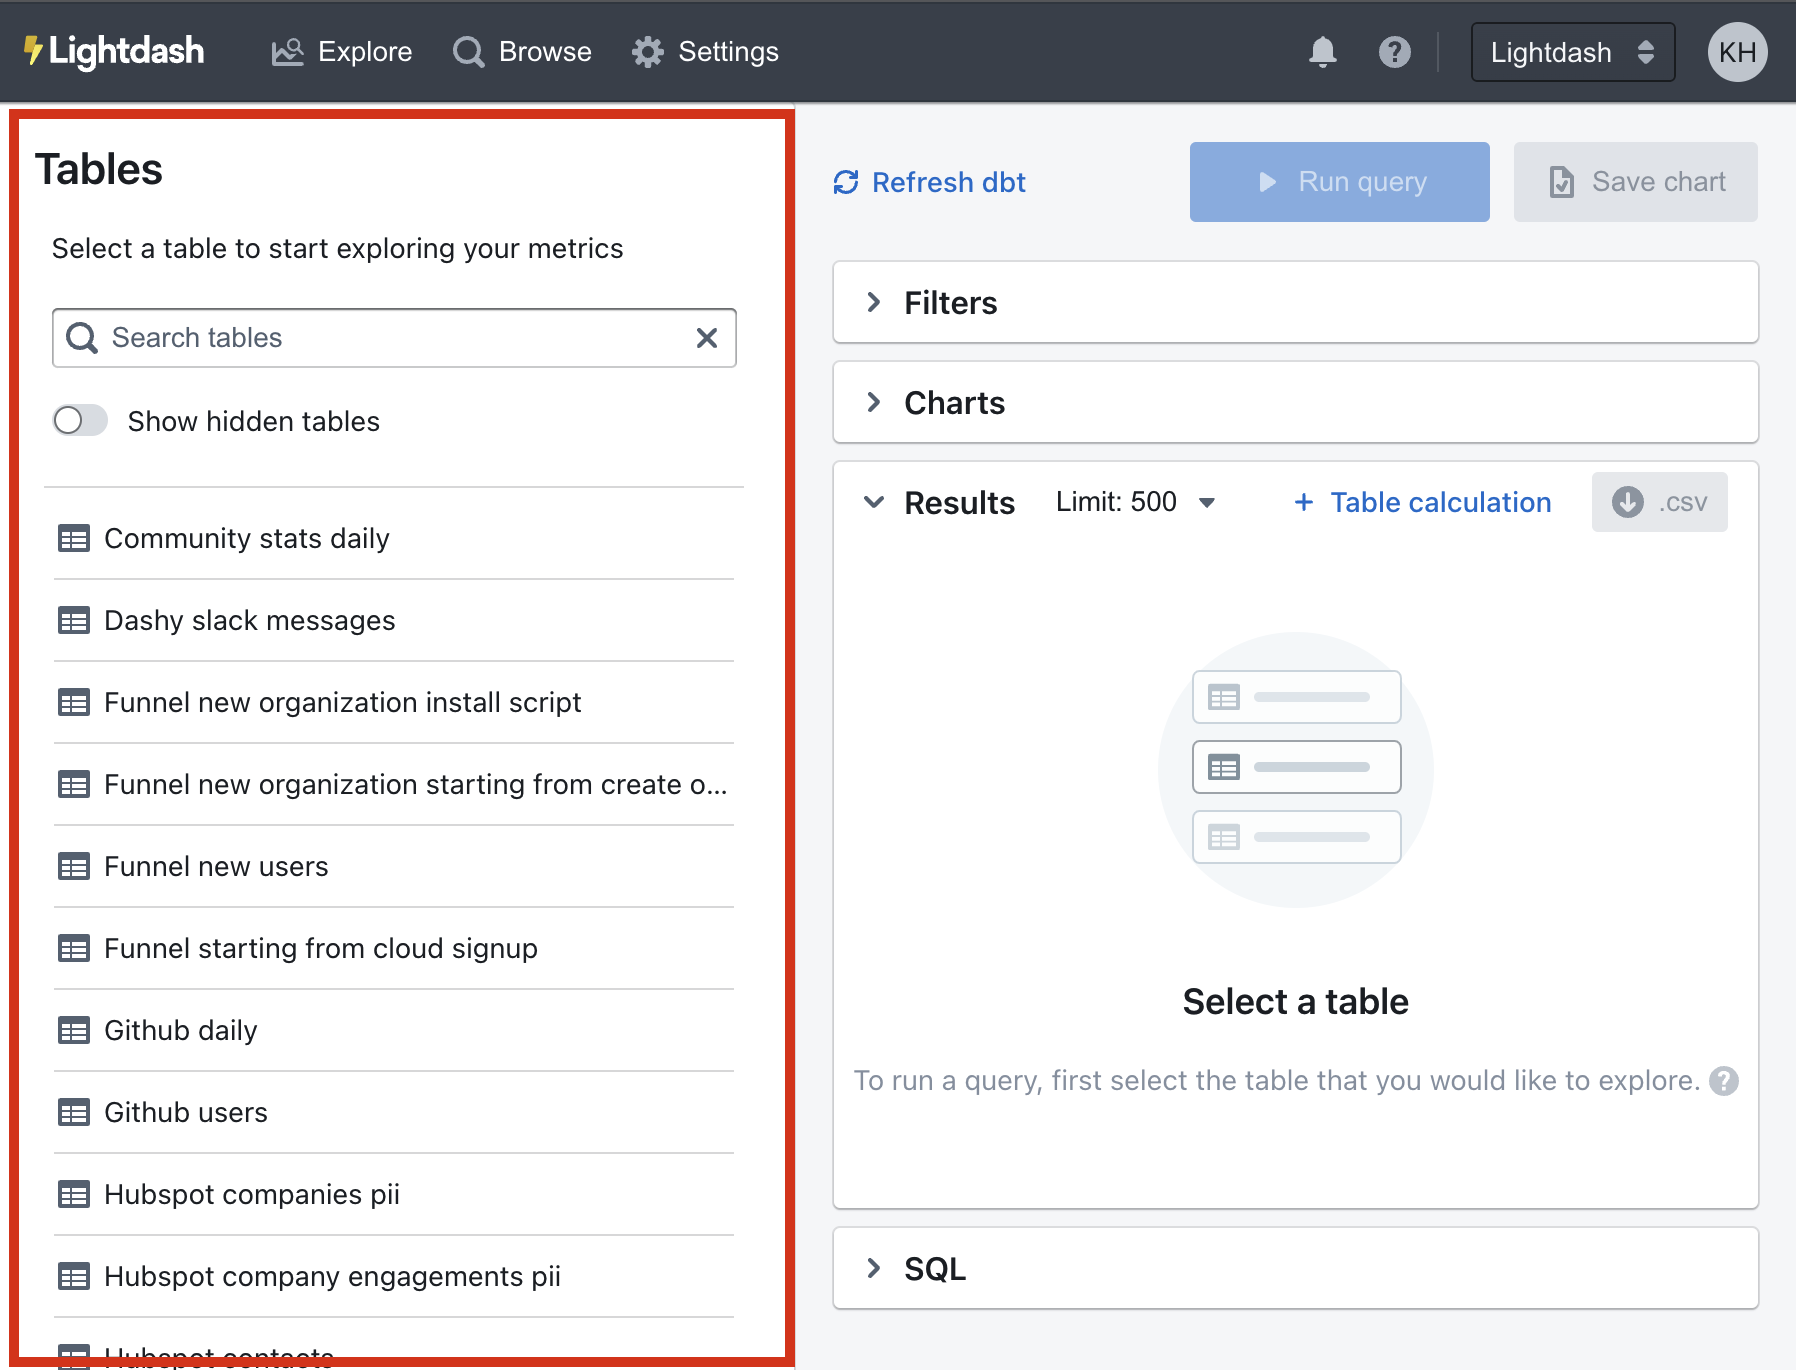
The beauty of Lightdash is that we're pretty well synced with your dbt project. So, in Lightdash, Tables actually come from dbt models that have been defined in your dbt project's .yml files.
If your dbt model has been defined in a .yml file, it will appear in Lightdash as a Table.
info
Not sure what a .yml file is? Make sure to check out dbt's docs to learn more about building .yml files for your dbt project.
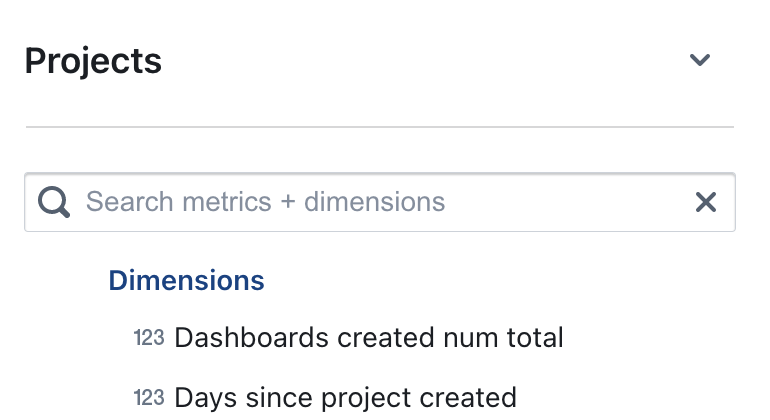
For example, if we had a file called projects.yml in dbt that looked something like the one below, we'd see a Table called Projects in Lightdash.
version: 2

models:
  - name: projects
    columns:
      - name: dashboards_created_num_total
      - name: days_since_project_created
We recommend structuring your dbt project with one .yml file per model (or .sql file).
We've found that this makes it easier to navigate through your .yml files and easier to manage your dbt models, especially as your project becomes bigger.
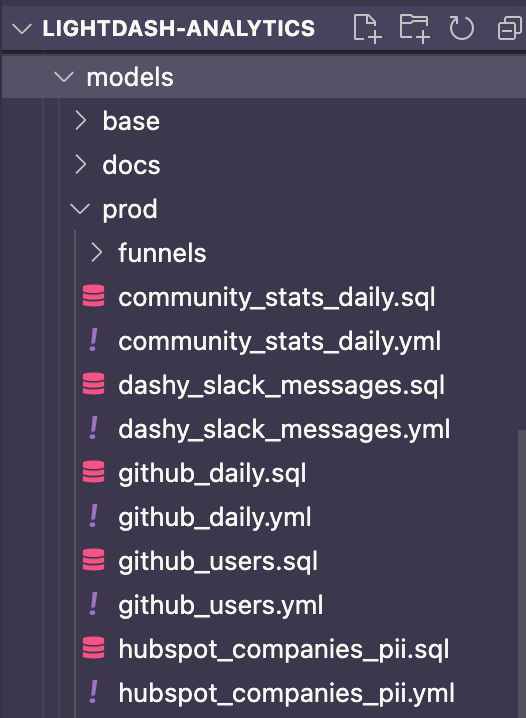
Here's an example of our dbt project at Lightdash too see what that looks like in practice:
- We have one .sql file per model (these are the files where all of our models' business logic sits)
- We have one .yml file per model (these are the files where all of your Tables' configuration sits)
But, in my dbt project, I have a single schema.yml file. Not one for each model. Will that still work?
Yep! We realize that schema files come in all shapes and sizes.
Some people prefer to write the .yml files for all of their models in a single .yml file at the directory level, and that's totally fine - it will still work with Lightdash.
But, like we said just above, if you're trying to decide how to setup your dbt project, we'd recommend having one .yml file per model.
Creating Tables and their dimensions in Lightdash using lightdash dbt run
Dimensions are attributes of your data. They are directly linked to a column in a dbt model.
To explore data in Lightdash, you need to have dimensions defined in your Tables. Dimensions are created automatically when you define columns in your dbt model properties.
For example, if we go back to our projects.yml file from above, we'd have a Table called Projects and it would have the dimensions: Dashboards created num total and Days since project created.
version: 2

models:
  - name: projects
    columns:
      - name: dashboards_created_num_total
      - name: days_since_project_created
info
Before you get started with the next steps, you might want to check out onto a new branch if you're working with a version controlled project!
To get our dbt project Lightdash-ready, we need to define all of the columns in our dbt models that we want to explore in Lightdash. We've made this really easy to do using our CLI tool and the command:
lightdash dbt run
This command runs our dbt project to create our analysis-ready tables in our data warehouse. Then, it auto-generates our Lightdash configuration.
You have a few options with this command though:
1. Generate Tables and dimensions for my entire dbt project
To do this, you just need to run the following on your command line:
lightdash dbt run
This command will run + generate tables for all of the models with .yml files. It will also generate dimensions for all of the columns in your dbt project.
2. Generate Tables and dimensions for some of the models in my dbt project
There may be a specific set of models that you want to start out with as Tables in Lightdash. If this is the case, we recommend using dbt's tags to tag these models. You can use sets of existing tags, or you can create a new Lightdash-specific tag. Something like this:
{{
  config(
    materialized='table',
    tags=['lightdash']
  )
}}
The lightdash dbt run command supports dbt model selection syntax to generate .yml files for a group of models. This means you can use tags or other model selection syntax to specify which models you want to generate dimensions for in your dbt project.
lightdash dbt run -s tag:lightdash # all models with the lightdash tag
lightdash dbt run -s payments  # just payments
lightdash dbt run -s payments+ # payments and all children
lightdash dbt run -s +payments # payments and all parents
lightdash dbt run -s payments+ +customers tag:lightdash # mix and match
After running our dbt project, lightdash dbt run is going to auto-generate all the configuration that Lightdash needs to build your semantic layer. Here’s an example of an auto-generated .yml file that you might see:
# customers.yml
version: 2
models:
  - name: customers
    columns:
      - name: customer_id
                meta:
                    dimension:
                        type: string
      - name: name
                meta:
                    dimension:
                        type: string
      - name: created_at
        meta:
          dimension:
                        type: timestamp
The customers.yml file tells Lightdash about all the attributes of customers. So by now our Lightdash project usually looks a little like this:
lightdash-project
├── dbt_project.yml
└── models
    ├── customers.sql
    └── customers.yml
Now let’s push this project to Lightdash so we can start exploring our data through the UI.
Make sure your changes are in production, then you're ready to go!
If you're working with a version controlled project, you'll just want to make sure to merge your changes into production (e.g. main or master) before you move onto the next steps.
Once you've got the model .yml files where you want 'em, you're ready to move onto the next step of connecting your project.